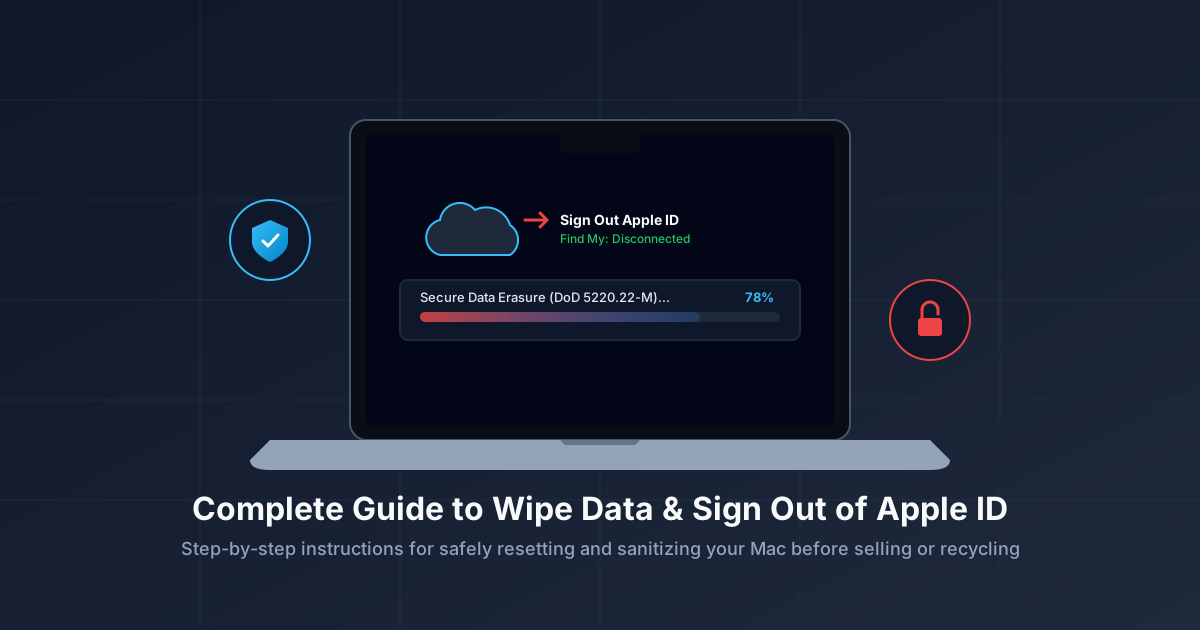
Preparation of your Mac for resale, trade-ins, or recycling is not simply a matter of dragging your personal files into the Trash bin. If you dispose of a Mac without the proper safeguards in place, there’s a good chance that your private data, your financials, and your account passwords will become accessible. Even worse, if you don’t detach yourself from Apple environment, the new user may be locked out or even have access to your personal cloud.
In this article, we take a look at all of the necessary steps for signing out of your Apple ID account and sanitizing your Mac using software such as MacMister Data Wipe Software for Mac.
Why Standard Deletion is Not Enough?
If you were to delete a file or reformat your hard drive via the old-fashioned way, then what usually happens is that the macOS system just removes the index pointer to the files and leaves the fragments themselves untouched, making it easy for advanced data recovery software to recover your pictures, documents, and passwords.
In order to protect your privacy, you need to do the following:
- Detach your accounts and all other services (Apple ID).
- Sanitize your hard drive.
Step 1: Back Up Your Data
Always remember to create a backup copy before running any major wipe or restore operation.
1. Attach an external hard drive to your Mac.
2. Launch Time Machine from the System Preferences or the Spotlight application.
3. Simply choose your backup hard drive and create a duplicate copy of your system.
Step 2: Sign Out of Your Apple ID and Associated Services
Logging out of your Apple ID means disabling functions like iCloud, iTunes store, Find My Mac, and iMessage. Not logging out of your Apple ID from a device that you no longer wish to use poses problems for activation lock and privacy of your data.
For macOS Ventura, Sonoma, Sequoia, and Later:
1. From the Apple menu in the top left, choose System Settings.
2. Select your Name (Apple ID) from the top of the sidebar.
3. At the bottom of the right panel, click Sign Out.
4. Follow the instructions to retain or delete any local copy of your iCloud data (you should delete local copies because you are letting go of the computer).
5. Enter your Apple ID password to disable the Find My Mac feature and finish signing out.
For macOS Monterey and Earlier:
Step 1. Open System Preferences.
Step 2. Select “Apple ID” and choose “Overview” from the sidebar.
Step 3. Click on “Sign Out”. You’ll be asked whether you want to save the copy of your iCloud data on your Mac; select an option, enter the password and turn off Find My Mac.
Then open the Music, Podcasts, and App Store applications, go to their main menus in the menu bar, click on Account and select “Sign Out” there. Next, open the Messages application, go to “Settings” > “iMessage” and sign out there.
Step 3: Permanently Erase Your Mac Hard Drive
With your accounts being dissociated, it is now time to turn your attention to the actual content stored in your computer hard drives. With basic functionality provided by such software as Disk Utility in terms of formatting, some people search for certain standards in sanitization.
However, if you want complete peace of mind, then there is software such as MacMister Data Wipe Software for Mac, which will give you secure data wiping. The software has been specially designed for Mac operating systems and provides military-grade data wiping.
Working Guide to Use MacMister Data Wipe Software:
Step 1. Download and install the MacMister Data Wipe Software on your computer.
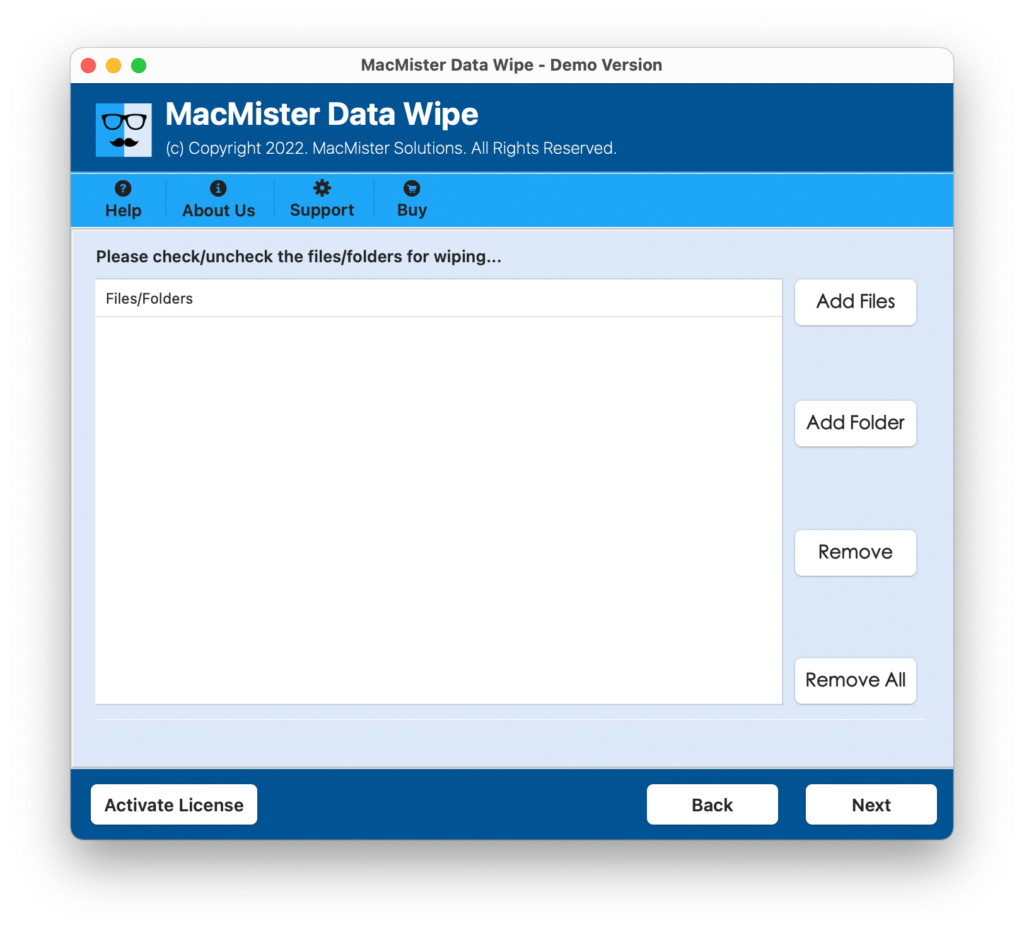
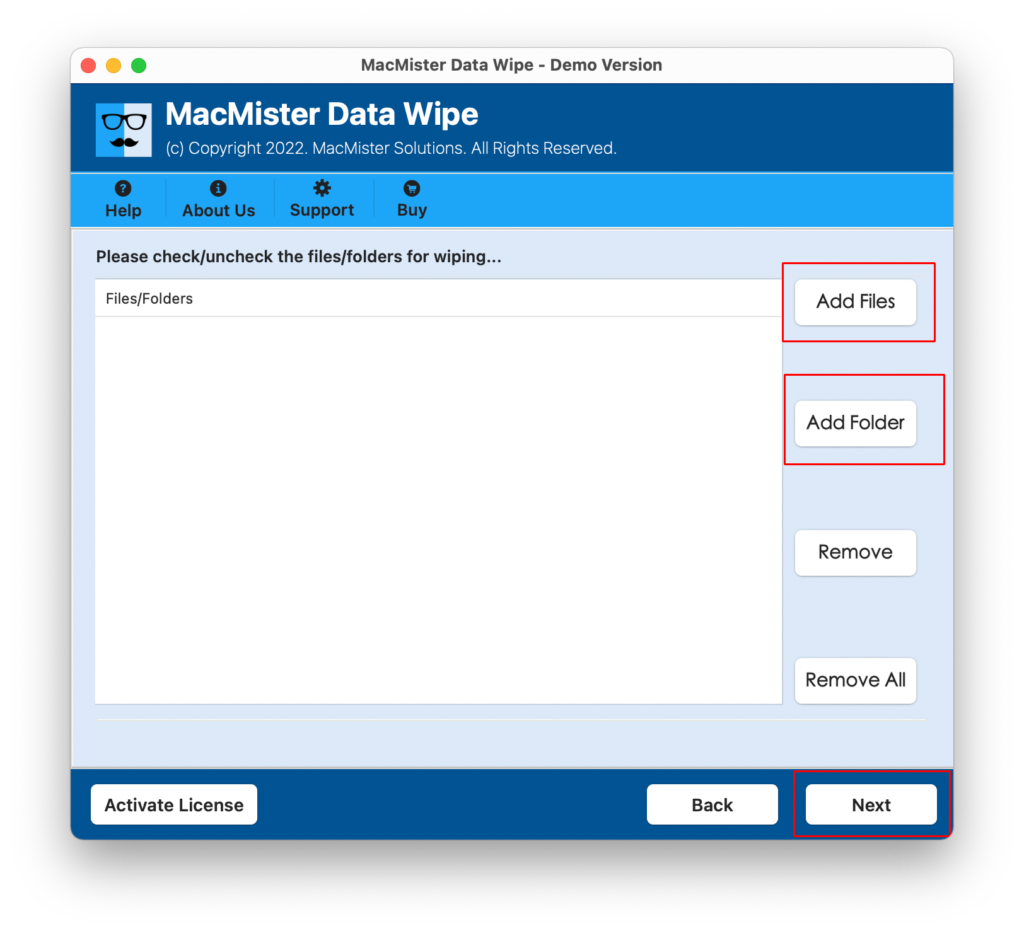
Step 2. LAUNCH the program and determine whether you would like to choose a particular Files & Folders or Entire Hard Drive.
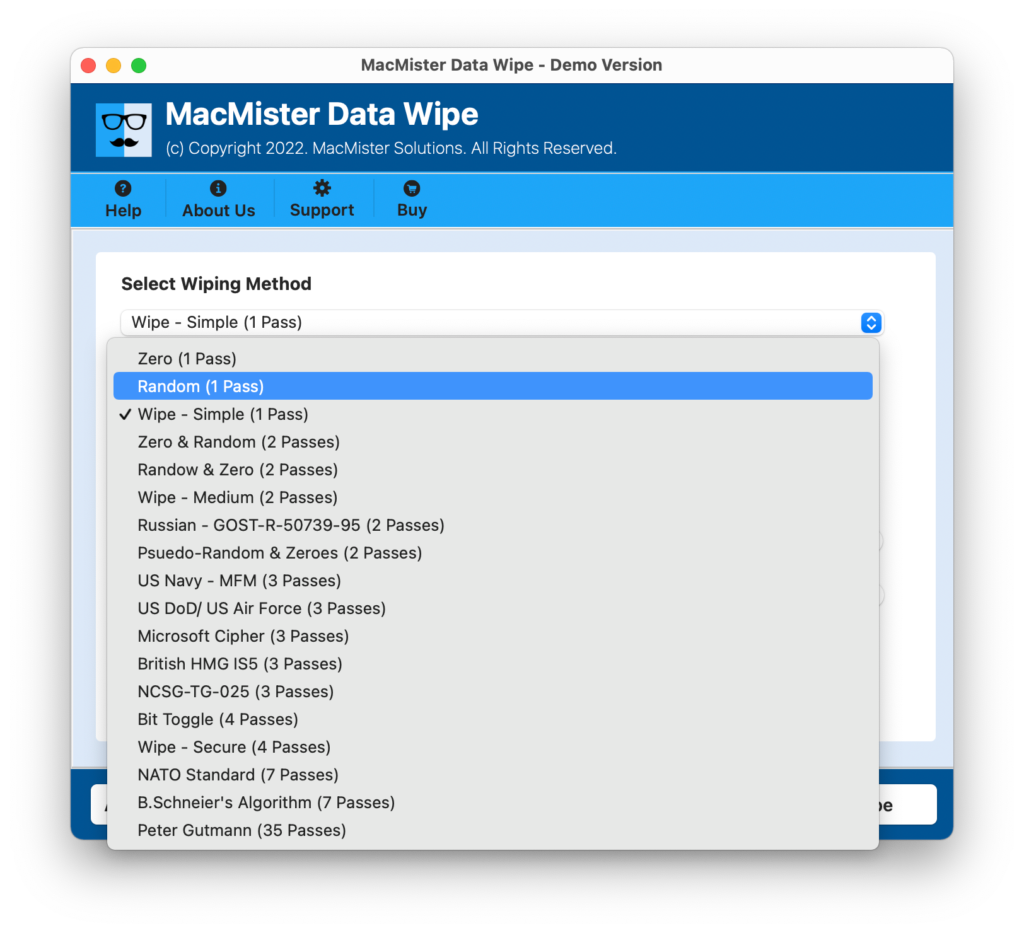
Step 3. Select which Wipe Method you want to use (US DoD, Zero & Random), depending on your security needs.
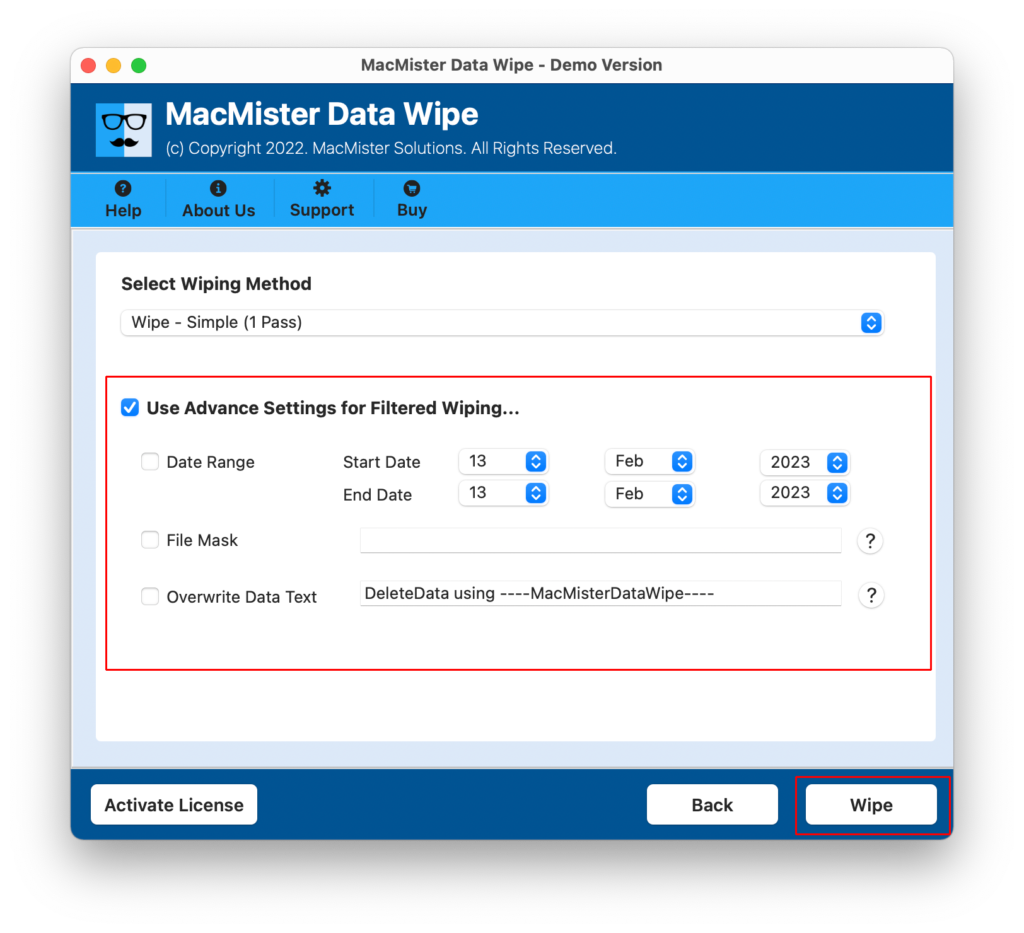
Step 4. Apply Data Filtering as per your requirements and tap Wipe.
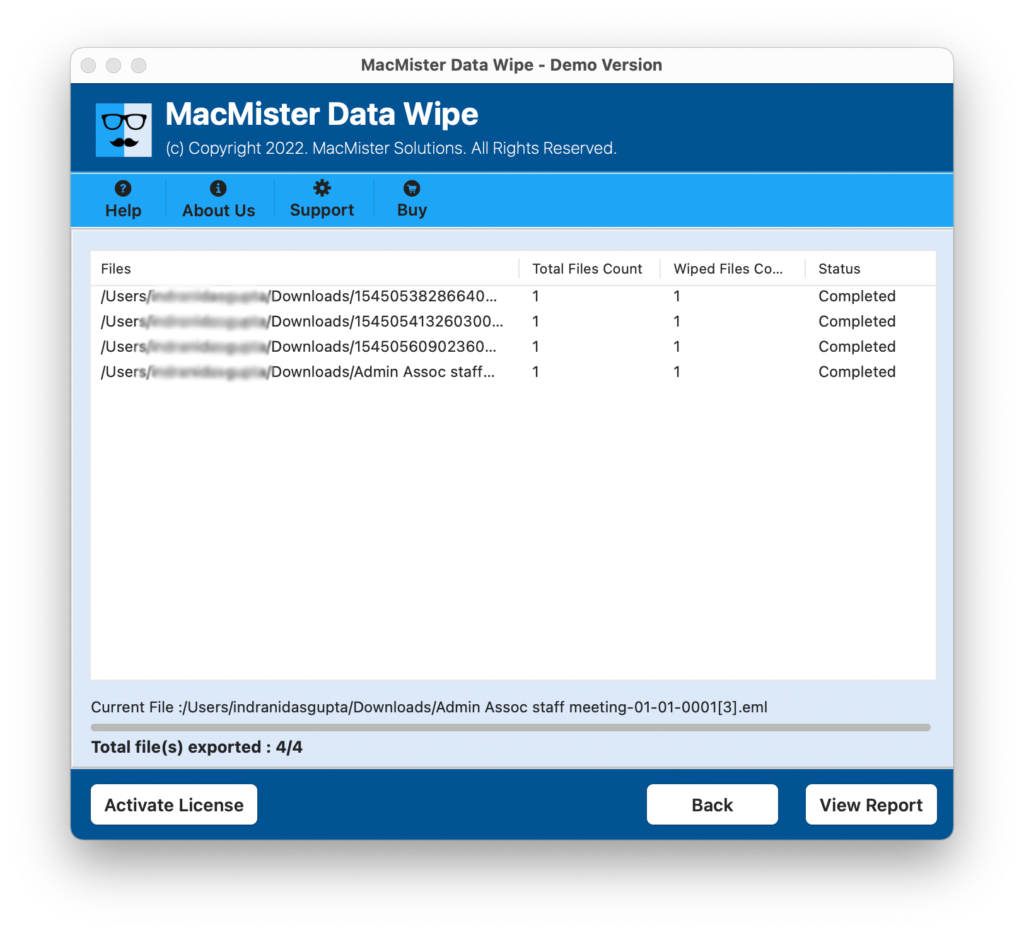
Step 5. Check Live Wiping Progress to track the current wiping status.
Key Features of MacMister Data Wipe for Mac:
- The software provides more than 10 international standards for erasing data, which include Zero (1 pass), Random (1 pass), US Navy (MFM/RLL), Microsoft cipher, US DoD / US Air Force and NATO Standard (7 passes).
- Programmed with dual buttons i.e. Add File(s)/Add Folders with the help of users can either wipe data individually or the entire folder with ease.
- Offers Data Filtering section that such as date range, file mask, and overwrite data text.
- The software runs smoothly in all versions of macOS.
Step 4: Reinstall macOS (If Selling or Giving Away)
Since you are transferring the physical device to someone else, having macOS installed on the device without any personal settings would help the user install the device as a new computer.
Step 1. Turn off your Mac fully.
Step 2. Start the computer in Recovery mode:
- Apple Silicon (M1/M2/M3/M4): Hold down the Power button till the “Loading startup options” message shows up, then click on the gear icon (Options) and click Continue.
- Intel Mac: Immediately press Command + R (⌘+R) after holding the Power button till you see the Apple logo.
Step 3. Choose Reinstall macOS on the macOS Utilities window and proceed according to the onscreen instructions.
Step 4. While configuring the new region and account setup assistant shows up on screen, do not proceed further. Instead, press Command + Q to shut down your Mac.
Conclusion
The preparation of a Mac for new ownership entails a lot more than just a cursory scan of your folders. Signing out of your Apple account, deactivating any tracking applications such as Find My Mac and deleting all data through special software like MacMister Data Wipe Software for Mac ensures that your digital identity stays safe from any intrusion and theft of data. This will ensure that you can be at ease, knowing that your old Mac is clean and ready for its new owner.