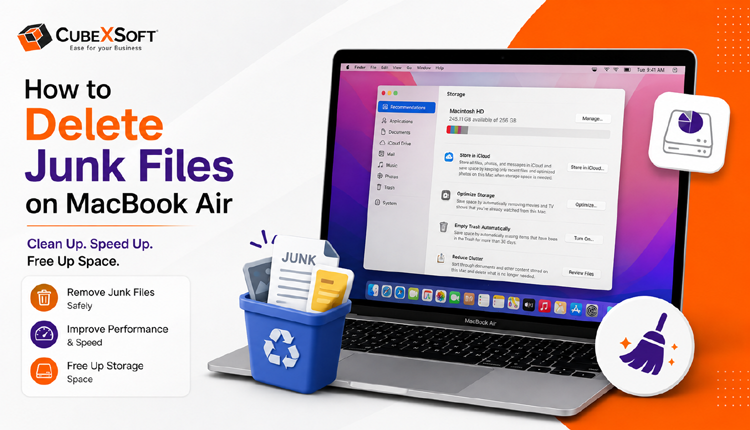
MacBook Air devices are popular for their sleek design, lightweight build, and smooth performance. However, over time, even the fastest Mac models powered by Apple Silicon or Intel processors may experience slowdowns. One of the main reasons behind reduced performance is the accumulation of unnecessary junk files that consume valuable storage space.
Junk files are created during regular system usage and may include temporary files, application caches, system logs, outdated backups, browser data, unused language files, and duplicate items. When these files continue to build up, they occupy your SSD space and can affect system performance, updates, and overall responsiveness.
This guide explains different ways to identify and remove junk files from your MacBook Air. From using built-in macOS storage management options to manually cleaning unnecessary data and using dedicated cleanup tools, you will learn effective methods to keep your Mac optimized.
Understanding Different Types of Junk Files on macOS
Before removing unnecessary data, it is important to understand what types of files usually take up storage space:
- Cache Files: Created by macOS and applications to improve loading speed. Over time, outdated cache data can become unnecessary and occupy disk space.
- Application Logs: Generated by apps to record activities, errors, and system events. Old log files can be removed when they are no longer required.
- Unused Language Files: Many applications include support files for multiple languages that users may never use.
- Application Leftovers: Removing an application does not always delete related support files, preferences, and hidden data.
- Large and Duplicate Files: Old downloads, installation files, archived folders, duplicate documents, and unused media files can consume significant storage.
- Trash Items: Files moved to Trash continue using storage until the Trash folder is emptied permanently.
Method 1: Use macOS Built-in Storage Management
macOS includes built-in storage tools that help users analyze disk usage and remove unnecessary files without installing additional software.
Step 1: Check Storage Recommendations
- Click the Apple menu from the top-left corner.
- Open System Settings (or About This Mac on older macOS versions).
- Navigate to General > Storage.
- Allow macOS to scan your drive and display storage usage details.
Step 2: Enable Automatic Storage Optimization
Under the storage recommendations section, you can enable options such as:
- Store in iCloud: Moves selected photos, documents, and messages to iCloud while saving local storage space.
- Optimize Storage: Automatically removes already-watched Apple TV content when additional space is needed.
- Empty Trash Automatically: Deletes items that have remained in Trash for a specific period.
Step 3: Remove Unnecessary Files Manually
Review storage categories such as Applications, Documents, and Downloads:
- Find large files you no longer need.
- Remove outdated installers, duplicate files, and unused documents.
- Empty Trash after deletion to permanently free storage space.
Method 2: Manually Remove Cache and Log Files
Advanced users can manually clean temporary files using Finder. This method gives more control over which files are removed.
Clear User Cache Files
- Open Finder.
- Press Shift + Command + G to open the Go to Folder window.
- Enter ~/Library/Caches and press Enter.
- Review the available cache folders.
- Delete unnecessary cache files or folders related to applications you no longer use.
- Move selected items to Trash.
Remove Old System Logs
- Open Finder and use Shift + Command + G.
- Enter ~/Library/Logs.
- Select outdated log files and move them to Trash.
- Repeat the same process for the /Library/Logs folder if required.
Method 3: Delete Browser Cache and Temporary Data
Web browsers store cache files, cookies, and browsing history to improve loading speed. Removing old browser data can help recover storage space and improve privacy.
Safari
- Open Safari and press Command + , to access Settings.
- Select Privacy.
- Click Manage Website Data.
- Choose Remove All to clear stored website data.
Google Chrome
- Open Chrome and press Command + Shift + Delete.
- Select All Time as the time range.
- Choose Cached images and files and Cookies and other site data.
- Click Clear Data.
Method 4: Use a Dedicated Tool to Remove Junk Files Completely
For users who want a faster and more convenient way to clean junk files from MacBook Air, a dedicated cleanup application can simplify the process. CubexSoft Data Wipe for Mac allows users to permanently remove selected files and folders with a simple interface.
The tool supports adding specific files or folders for deletion and is designed for both beginners and professional users. With an easy three-step process, users can remove unwanted data quickly without manually searching through multiple system locations.
The software also provides additional features for managing file deletion according to user requirements. A free trial version is available, allowing users to explore its functionality before choosing the full version.
Final Thoughts
Removing junk files regularly is an effective way to maintain MacBook Air performance and keep storage space available for important data. While macOS provides built-in cleanup options, manual removal methods require careful handling to avoid deleting important files.
For users who want a simple and efficient cleanup process, automated junk removal software can save time and reduce the effort involved. Choosing the right method depends on your technical comfort level and the amount of unnecessary data stored on your Mac.