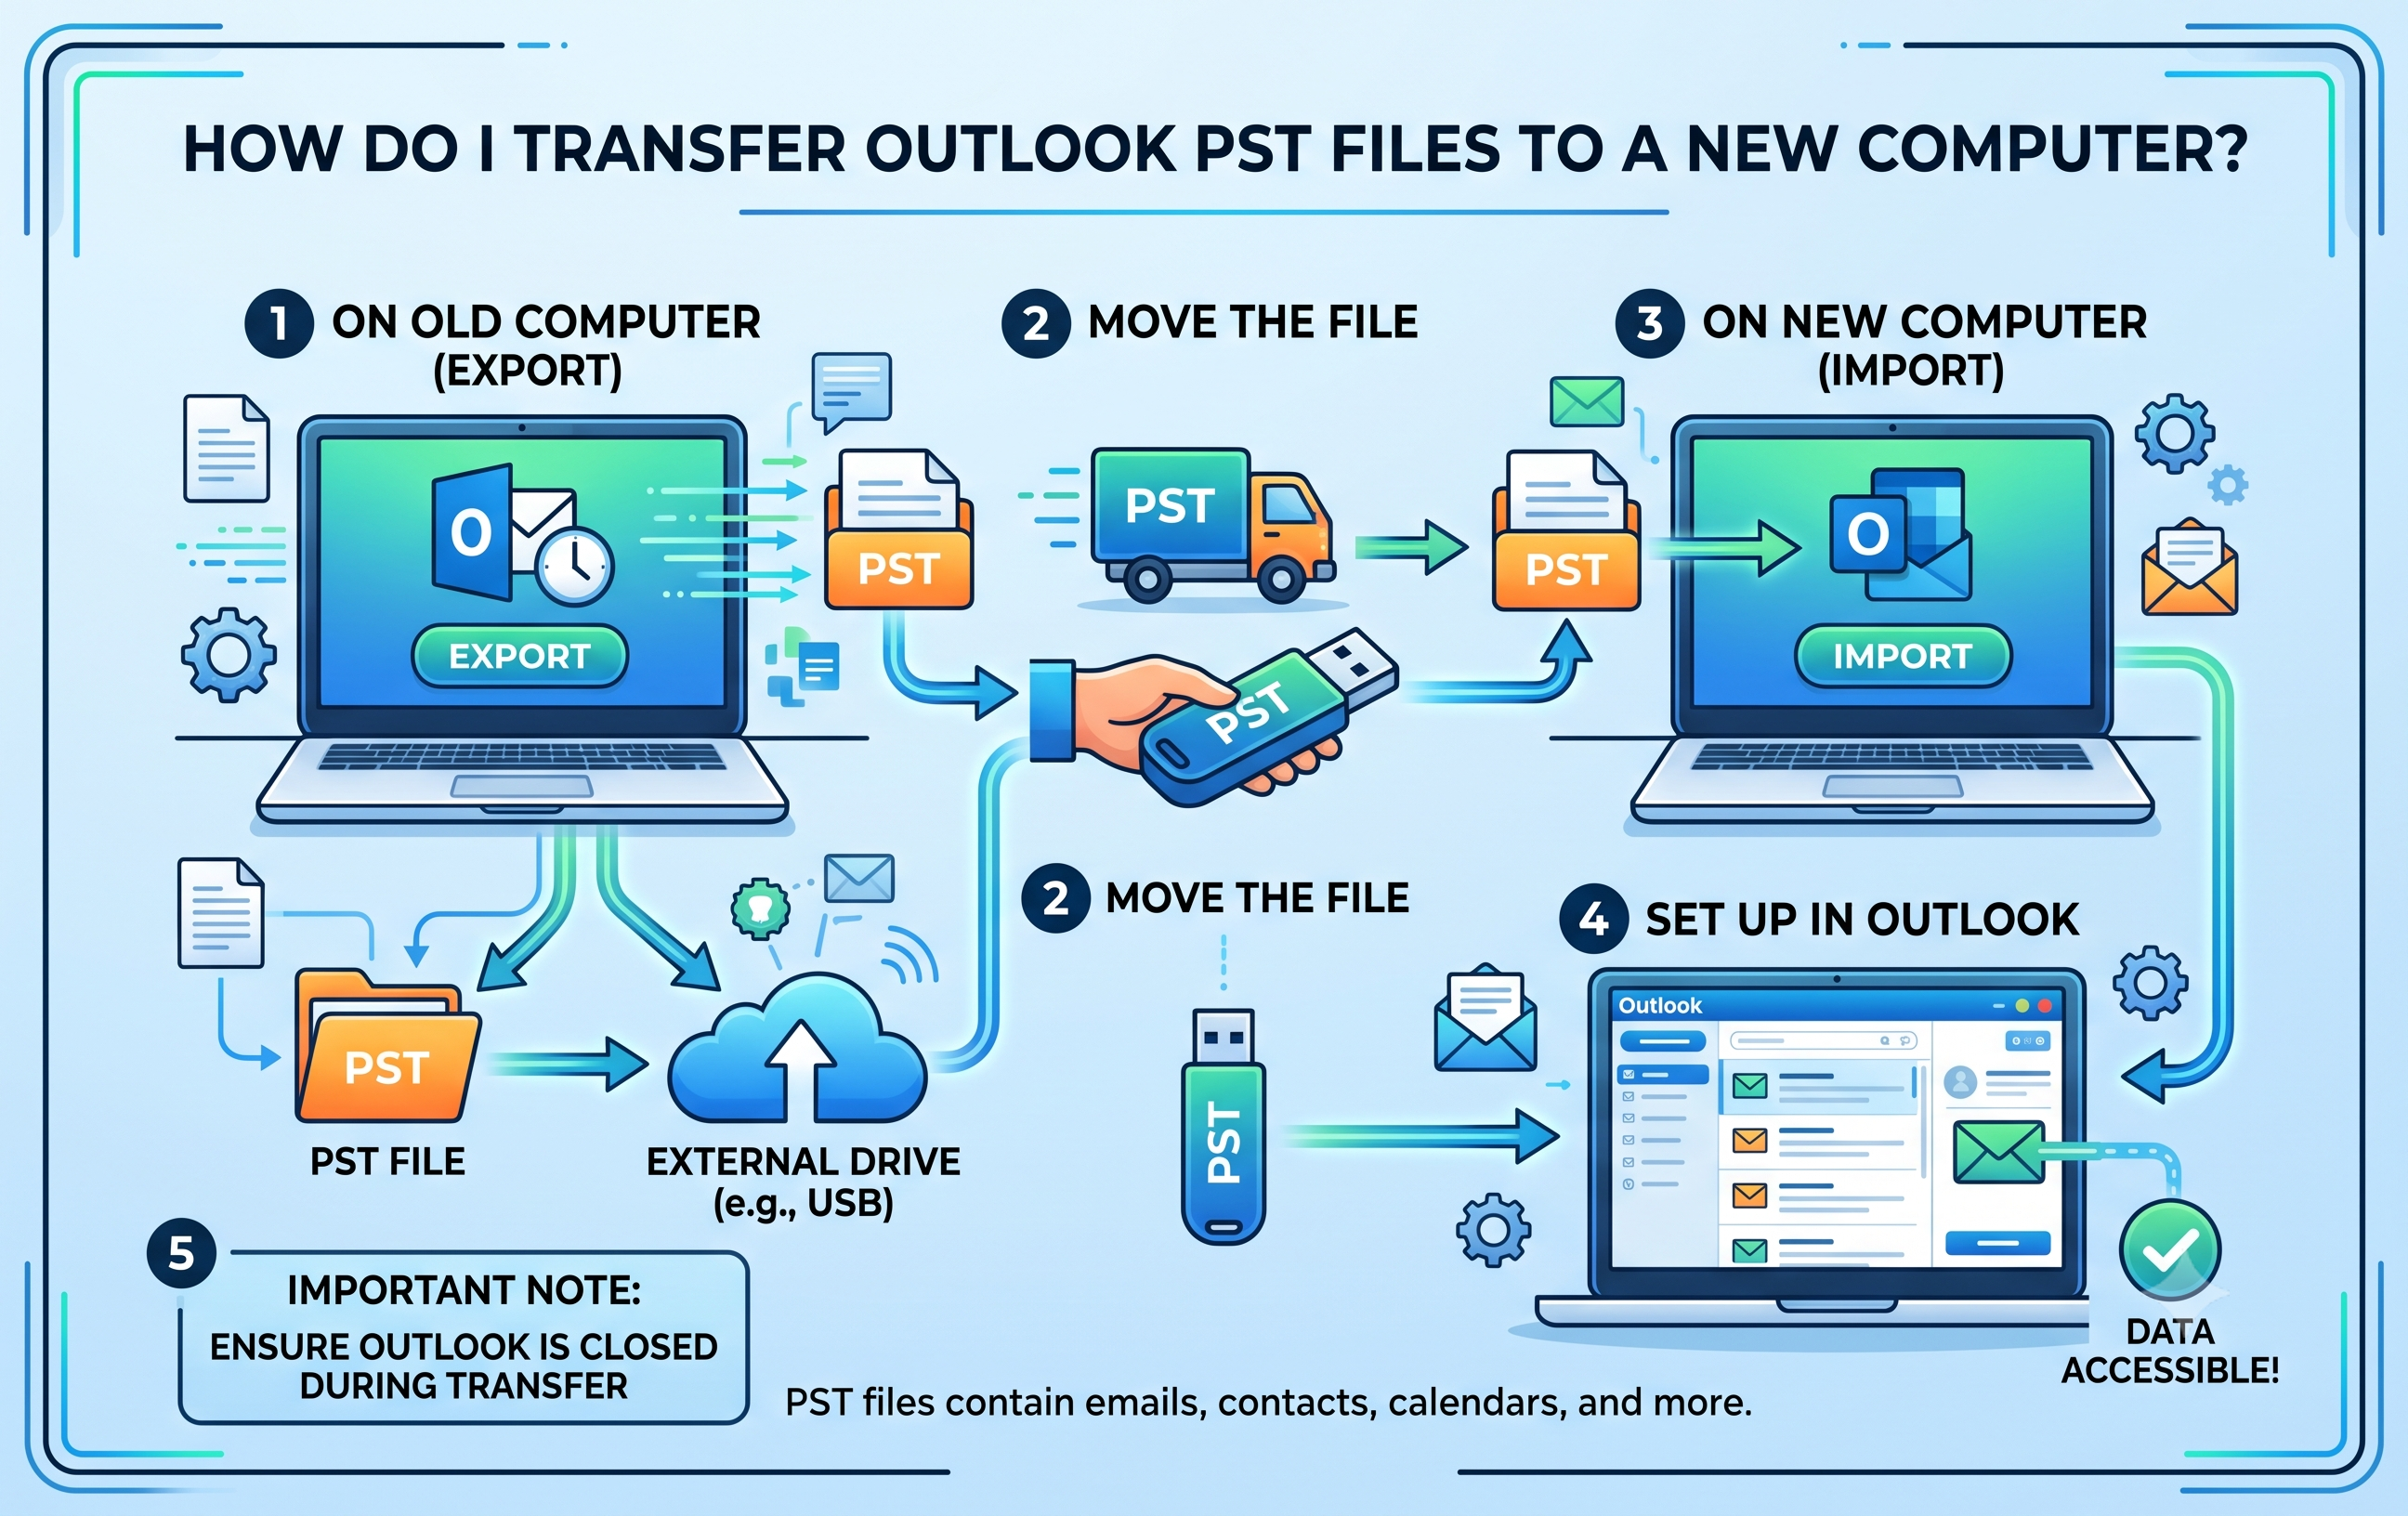
Migrating to a new computer provides you with a great opportunity to clean up your digital working space, but moving your desktop email data, such as Microsoft Outlook PST (Personal Storage Table) files, can be rather tricky. Given the fact that PST files contain not only emails but also calendars and contacts, migrating them calls for a systematic approach to ensure that no data corruption happens.
The following article will tell you how to migrate your Outlook PST files whether you are moving from Windows to Windows or from Windows to Mac, mentioning MacMister PST Converter Tool as one of the most effective tools for Mac users.
Phase 1: Locate and Prepare Your PST Files
Before copying any data from one machine to another, you need to find your PST archives on the source machine.
How to Find PST Files in Windows Outlook:
- Launch Outlook on the computer where the files are located.
- Go to File > Account Settings > Account Settings.
- In the Account Settings window, go to the Data Files tab.
- Select the desired data file and click Open File Location.
- Quit Outlook before copying the file to unlock the database.
The default location for Windows is C:\Users\%username%\AppData\Local\Microsoft\Outlook or Documents\Outlook Files.
Phase 2: Moving Data Between Computers
Pick the data transfer method that is suitable for your new system’s OS.
Method 1: Using an external device (SSD / Flash drive)
- Transfer the found .pst file to an external hard drive or large capacity flash drive
- Unclick the drive and plug it into the new computer.
- Paste the .pst file inside a selected folder on the destination PC (Documents/Outlook Data by default).
Method 2: Using cloud storage services
1. Upload your .pst file to your cloud drive accounts such as OneDrive, Google Drive or Dropbox
2. Log in to your account on the new computer and download the file locally. Make sure that you wait until the uploading process is complete before turning off your old computer to avoid losing some data in the process.
Phase 3: Import or Convert Data on the New Computer
Scenario A: Transferring windows to windows
Instructions for transferring email from outlook to outlook:
If your new PC also runs Windows OS with Microsoft Outlook,
- Open Outlook on the new PC.
- Go to File>Open & Export>Import/Export.
- Select the option Import from another program or file and click next.
- Choose Outlook Data File (.pst), select the PST file you saved, and click next.
- Select the desired options for handling duplicates, choose the destination folder, and click Finish.
Scenario B: Transferring windows to Mac (using MacMister PST Converter)
The migration process from one operating system to another requires an additional step because Outlook for Mac does not support PST files. This limitation means that users cannot directly import PST files created in Outlook for Windows into Outlook for Mac.
Besides, if you need to import a PST file with a considerable amount of data into Outlook Mac, the process may fail due to indexing errors. A reliable solution to address this issue is MacMister’s Mac PST Converter Tool. This utility allows you to convert PST files to supported mac outlook formats directly on your macOS without additional steps.
Why Use MacMister PST Converter?
- Facilitates conversion of PST files to Mac compatible formats like MBOX, OLM, EML, PDF, MSG etc.
- Standalone utility, so no need to install Windows Outlook on Mac.
- Keeps all the folders structure, Read/Write status, embedded images and email attachments intact.
- Upload multiple PST files at a time using Add Files or Add Folder option.
- Migrate PST data directly into the Cloud Webmail Service Providers (IMAP).
How to Convert PST Files on Mac with MacMister Guide
Transfer the required .pst file to the new Mac system using a pen drive or cloud storage.
Step 1. Launch your Mac computer and follow the simple steps below to convert PST files on your Mac:
Step 2. Install and launch the MacMister PST Converter for Mac tool on your system.
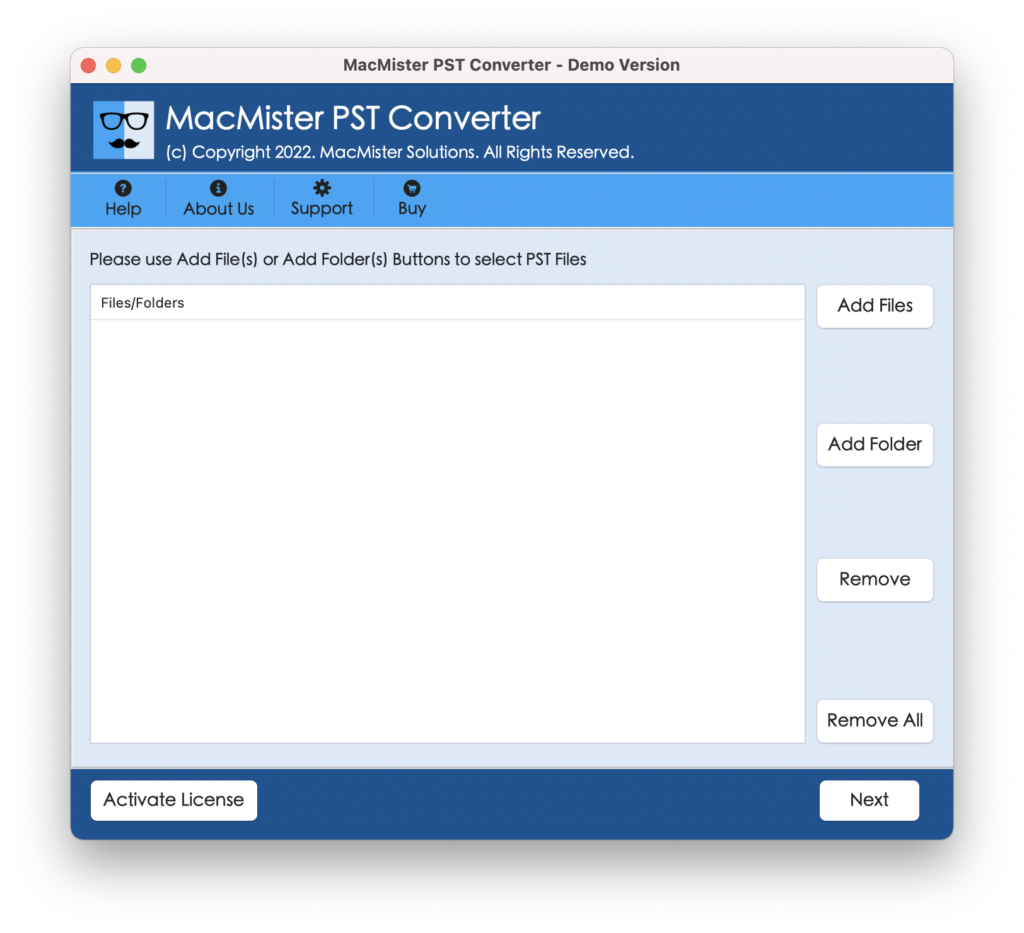
Step 3. Click on Add File(s) or Add Folder to upload the PST data.
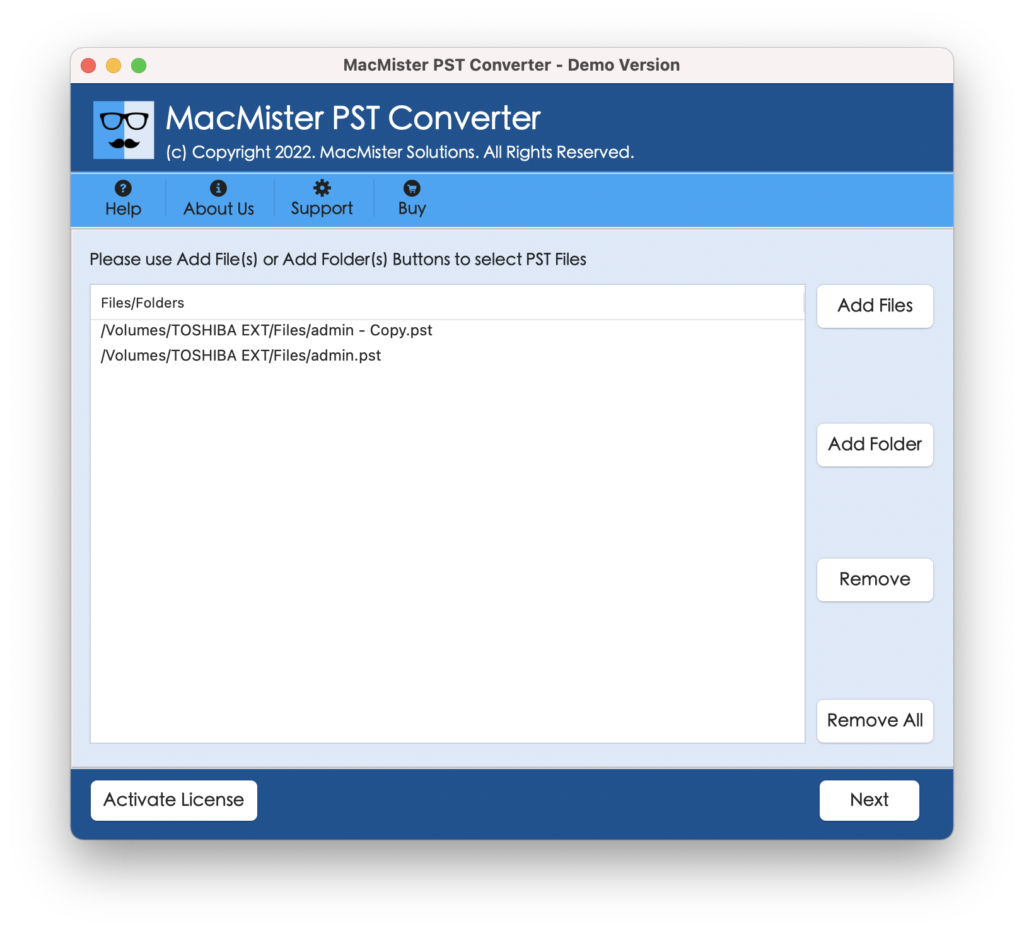
Step 4. Choose your preferable output format like MBOX, OLM, PDF, and EML from the drop-down menu.
- To save converted data in Apple Mail, choose MBOX
- To directly import into Outlook for Mac select OLM
- For PDF and EML are useful for archive purposes
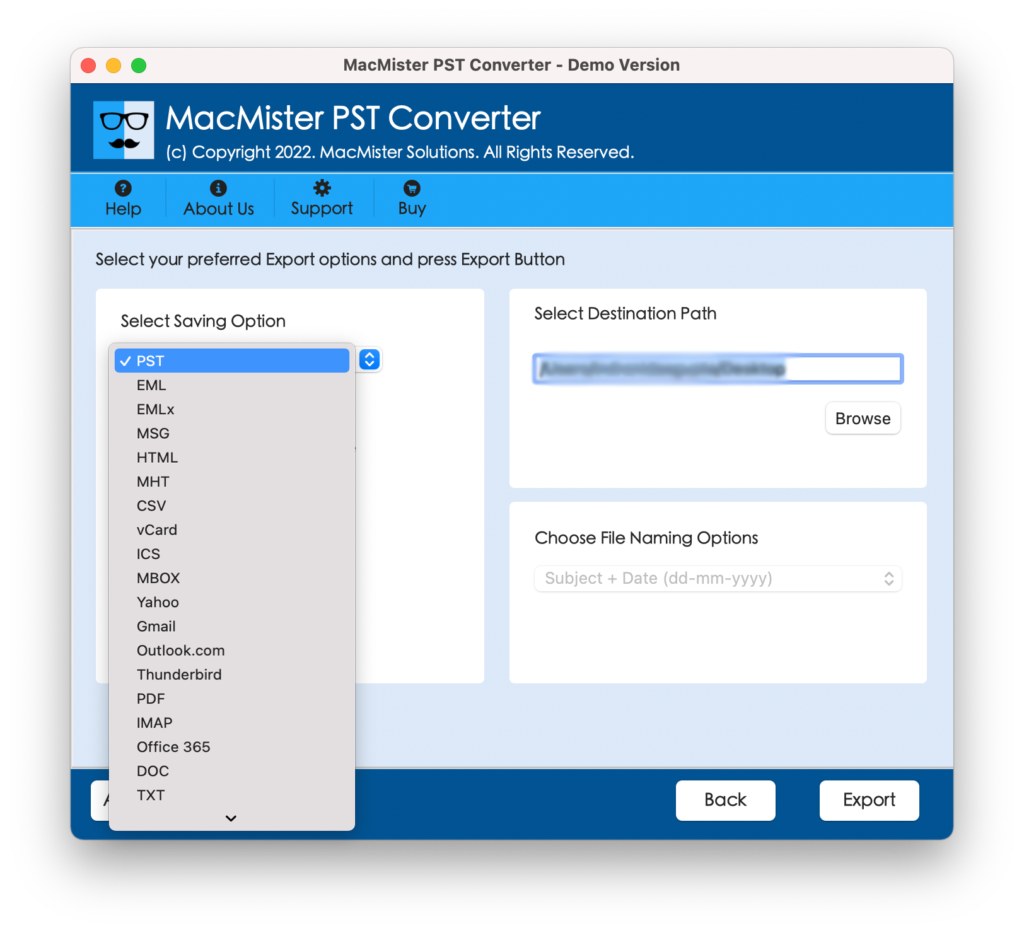
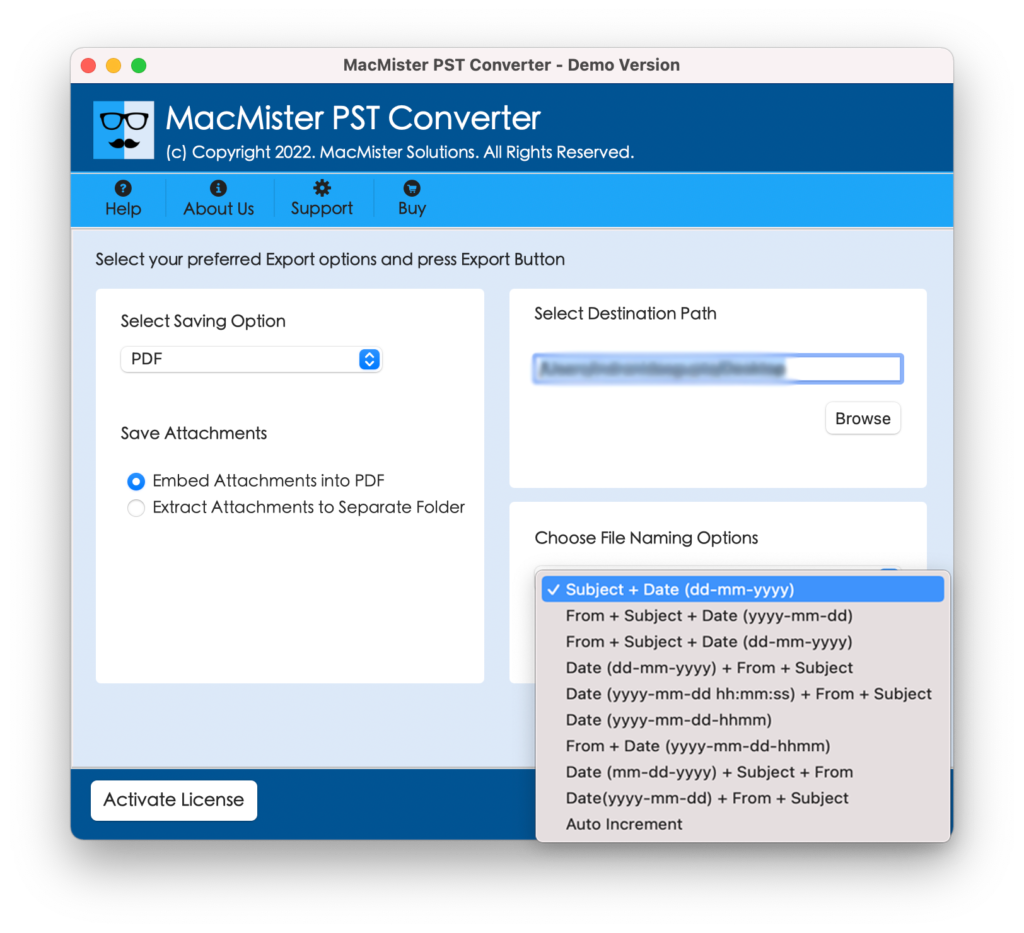
Step 5. Apply sub-options of a chosen saving type according to the requirements and tap Export.
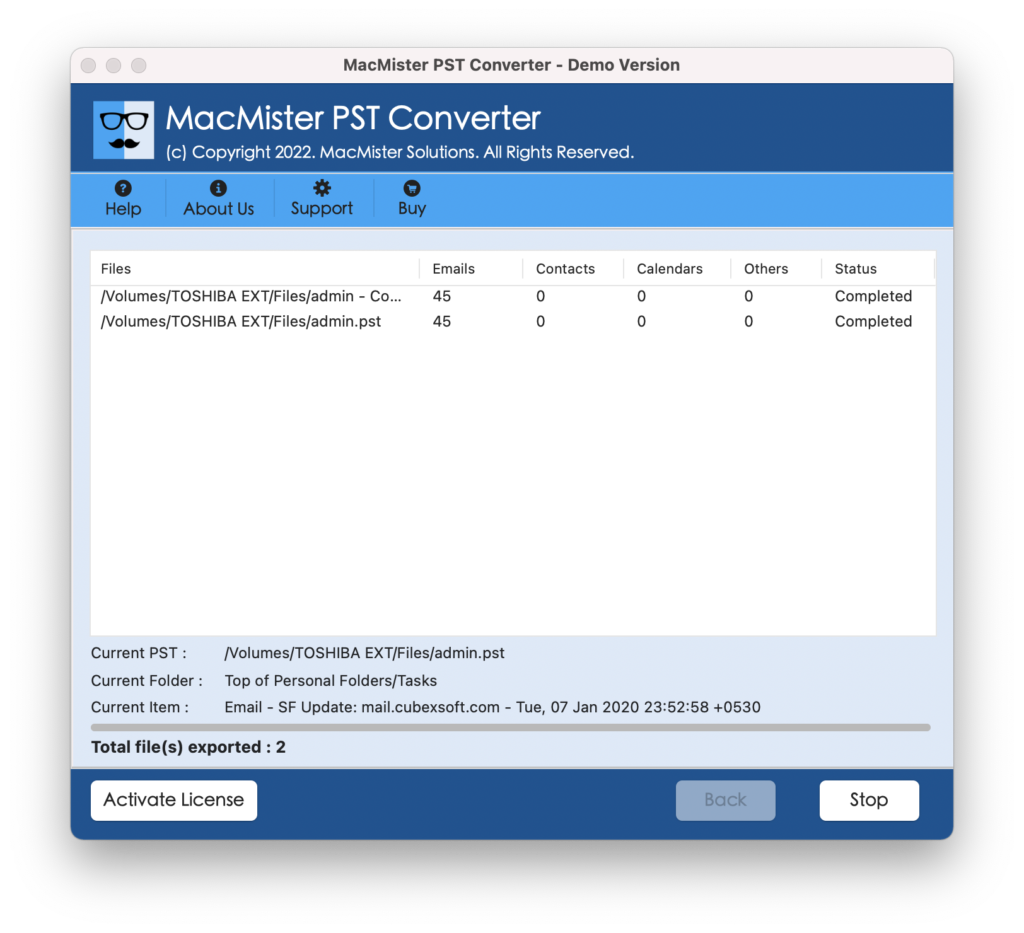
Step 6. Check Live conversion of PST files using Live Conversion Progress window appearing –
Conclusion
The successful migration of Outlook PST files to the new computer depends on determining the target operating system and migration tools. In case of migration within the same platform (Windows to Windows), the built-in Outlook utility will help move PST files. At the same time, migration to Mac should be carefully planned because of the challenges associated with the peculiarities of the file system and the need for additional tools. By using reliable solutions like MacMister PST Converter for Mac & Windows, you can overcome the barriers of file structure differences and transfer PST data to OS X Mail, Outlook for Mac, or Mac Outlook in an efficient manner. The migration process will be completed only after all files are backed up and transferred, so it is critical to ensure the integrity of the PST file.