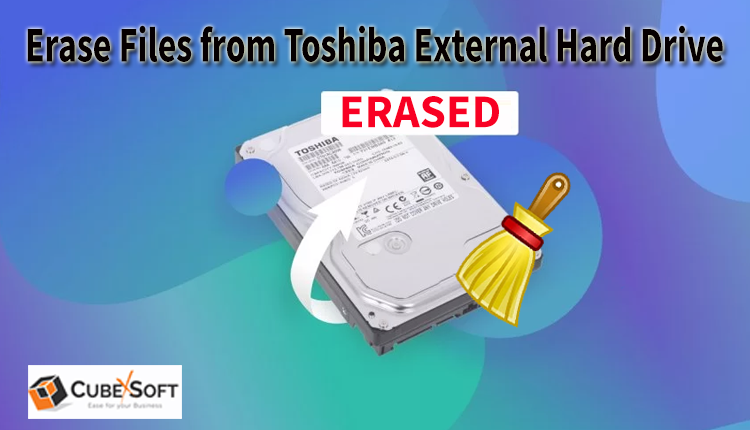
Deleting files from a Toshiba external hard drive on a Mac is usually straightforward. However, things can become complicated when files refuse to delete, the drive is read-only, permission errors appear, or you want to completely erase the drive before selling or disposing of it.
Fortunately, macOS provides several ways to remove unwanted files from an external hard drive. Depending on your requirement, you can delete individual files through Finder, reformat the drive using Disk Utility, or use Terminal for more advanced operations.
In this guide, we’ll explain different methods to delete files from a Toshiba external hard drive on Mac, along with solutions for common read-only and permission-related problems.
Understanding File Deletion on a Toshiba External Drive
When you delete a file from an external drive on Mac, it may not disappear permanently right away. In many cases, macOS moves the deleted item to the Trash. The storage space may not become available until you empty the Trash while the external drive is still connected.
The file system used by your Toshiba drive also matters. Drives formatted with APFS, Mac OS Extended, exFAT, or FAT32 generally allow macOS to write and delete files. However, an NTFS-formatted drive can create problems because macOS normally provides read-only access to NTFS volumes.
Before deleting anything, make sure the files you select are no longer needed or have been backed up elsewhere.
Method 1: Delete Files from Toshiba Drive Using Finder
The easiest way to remove files is through Finder. This method is suitable when your Toshiba hard drive allows read and write access on your Mac.
Step 1: Connect the Toshiba External Hard Drive
Connect the Toshiba drive to your Mac using a compatible USB cable, adapter, or hub. Wait for macOS to recognize the drive.
Step 2: Open Finder
Click the Finder icon in the Dock. Look for your Toshiba external hard drive under Locations in the sidebar.
Step 3: Locate the Files
Open the Toshiba drive and browse through its folders. Find the documents, photos, videos, or other files you want to remove.
Step 4: Move the Files to Trash
Select the unwanted files and press Command + Delete. You can also right-click the selected items and choose Move to Trash.
Step 5: Empty the Trash
Deleting the files does not necessarily free the storage immediately. To permanently remove them from the Trash, right-click the Trash icon in the Dock and select Empty Trash.
Keep the Toshiba drive connected while emptying the Trash to ensure the deleted files are removed from the external drive.
Method 2: What to Do When the Toshiba Drive Is Read-Only
Sometimes you may find that macOS lets you open and copy files from the Toshiba drive but does not allow you to delete, rename, or modify them.
One common reason is the NTFS file system.
NTFS is widely used by Windows computers. macOS can generally read NTFS drives, but it does not normally provide native write access. As a result, you may encounter messages such as:
- The file cannot be deleted.
- You don’t have permission to modify the item.
- The drive is read-only.
- Files can be opened but not changed.
If the drive needs to remain compatible with Windows and Mac, you can consider using an NTFS-compatible third-party solution that provides write access on macOS.
Alternatively, if you don’t need the existing data and want to use the drive primarily with Mac, you can erase and reformat it.
Method 3: Erase and Reformat the Toshiba External Hard Drive
If you want to remove all data from the Toshiba drive and start fresh, Disk Utility is a convenient option. Remember that formatting the drive deletes its existing contents, so create a backup before proceeding.
Step 1: Open Disk Utility
Open Finder → Applications → Utilities → Disk Utility.
Step 2: Show All Devices
In Disk Utility, click View in the toolbar and select Show All Devices.
Step 3: Select the Toshiba Drive
Find the Toshiba external hard drive in the left sidebar. Select the physical drive rather than an individual volume if you intend to erase the entire device.
Step 4: Click Erase
Click Erase at the top of the Disk Utility window.
Enter a name for the drive and choose an appropriate file system.
Which Format Should You Choose?
APFS: A good choice when the drive will primarily be used with modern Mac computers.
Mac OS Extended (Journaled): Useful for compatibility with older Mac systems.
exFAT: A practical choice when you need to use the external drive with both Mac and Windows computers.
You may also need to select GUID Partition Map as the partition scheme when erasing the physical drive.
Step 5: Confirm the Erase Operation
Click Erase and wait for Disk Utility to complete the process. Once finished, the Toshiba drive will be empty and ready for use.
Method 4: Delete Files Using Terminal
Terminal provides another way to manage files on an external drive. It can be useful when Finder encounters problems, but commands should be used carefully because an incorrect command can delete important data.
Step 1: Open Terminal
Press Command + Space, search for Terminal, and press Enter.
Step 2: Identify the External Drive
Enter: diskutil list
This displays the disks and volumes currently connected to your Mac. Identify your Toshiba drive carefully.
Step 3: Locate the Required File
You can navigate to the mounted Toshiba drive and identify the file or folder you want to remove.
For example, if the drive appears under /Volumes/Toshiba, you can navigate there with: cd /Volumes/Toshiba
Step 4: Remove the File or Folder
For a specific file, you can use: rm “filename”
For a folder and its contents: rm -r “folder-name”
Be extremely careful with rm commands. Always verify the file path before pressing Enter. A mistake can result in permanent data loss.
Why Deleted Files May Still Occupy Space
If you deleted files but the available storage on the Toshiba drive hasn’t increased, the files may still be stored in the Trash.
This can happen because macOS keeps deleted files in a hidden Trash location associated with the external drive. Empty the Trash while the Toshiba drive remains connected.
If the storage still doesn’t update, safely eject and reconnect the drive, then check the available capacity again.
How to Securely Erase a Toshiba Drive Before Selling It
Simply deleting files is not the same as securely erasing them.
When a file is deleted, its data may remain recoverable until the underlying storage space is overwritten or otherwise securely sanitized. This is particularly important when you’re planning to sell, donate, recycle, or give away your Toshiba external hard drive.
If the drive contains confidential documents, financial information, personal photographs, business files, or other sensitive data, consider using a dedicated data-erasure solution rather than relying only on normal deletion.
Securely Wipe Toshiba External Hard Drive on Mac
For users who need to permanently remove sensitive information, CubexSoft Data Wipe Software for Mac can be used as a dedicated data-erasure solution.
Depending on the software and drive configuration, a dedicated wiping utility can provide options for erasing files, folders, partitions, or entire storage devices.This approach can be particularly useful when the objective is not simply to free up space but to prevent previously deleted information from being recovered.
Important Things to Check Before Deleting Data
Before removing files from your Toshiba external hard drive, keep these points in mind:
- Create a backup of important files before deleting or formatting anything.
- Check the file system if macOS doesn’t allow you to modify the drive.
- Keep the drive connected when emptying Trash.
- Don’t format the drive unless you’re sure you no longer need its existing data.
- Double-check the selected disk before using Disk Utility or Terminal.
- Use secure data-erasure methods when disposing of a drive containing confidential information.
Final Words
Deleting files from a Toshiba external hard drive on Mac can be as simple as selecting the files in Finder and moving them to Trash. However, problems can occur when the drive is formatted with NTFS, has permission restrictions, or contains data that needs to be permanently erased.
For everyday file removal, Finder is usually enough. If the drive is no longer needed and you want to start fresh, Disk Utility can erase and reformat it. For advanced users, Terminal provides additional control, while dedicated data-wiping software can be considered when secure data destruction is the main goal.